An App Clip is a lightweight version of your app that lets people perform everyday tasks quickly, without downloading and installing your app.
App Clips focus on offering the fastest solution possible to a task, remaining on a device for a limited amount of time while preserving people’s privacy.
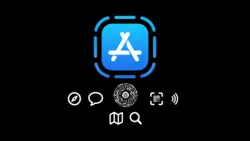
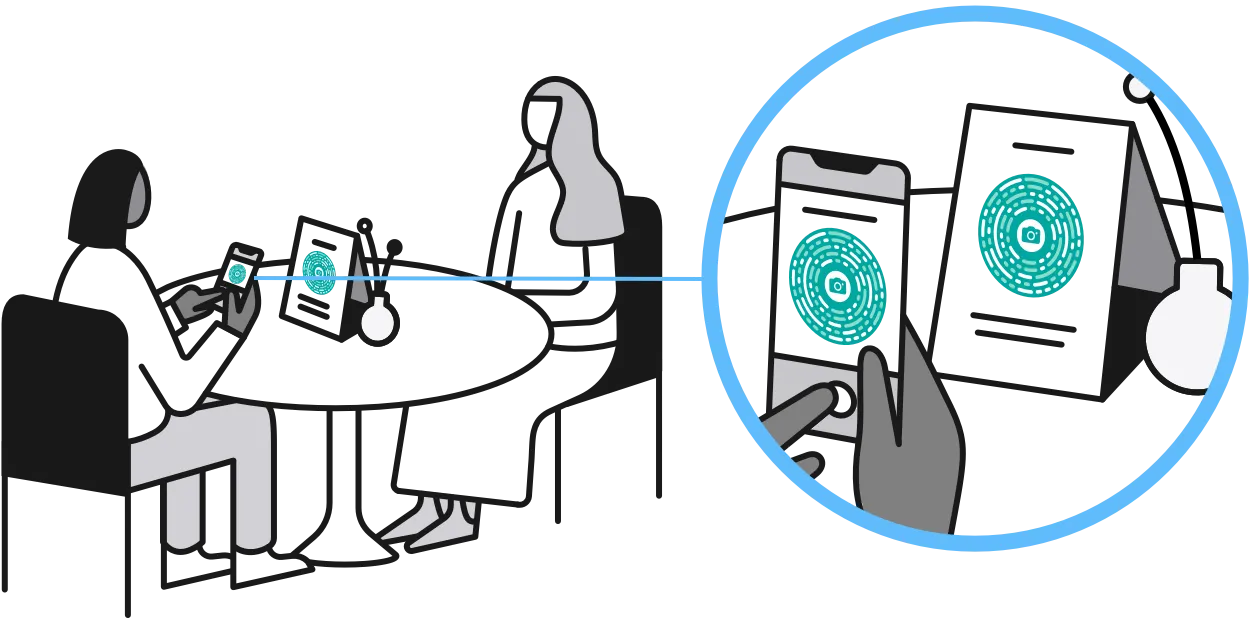
People discover and launch App Clips in a variety of situations and contexts. At a physical location, people launch an App Clip by scanning an App Clip Code, NFC tag, or a QR code. An App Clip Code tends to be the best way for people to discover and launch your App Clip because its distinct design is immediately recognizable, and people trust it to offer a fast, secure way to launch an App Clip.
On their device, people launch an App Clip from location-based suggestions they permit in Siri Suggestions, the Maps app, Smart App Banners on websites, App Clip cards in Safari, and by tapping links others share with them in the Messages app. Starting with iOS 17, an app can include links and App Clip previews that people tap to launch another app’s App Clip.

Consider creating an App Clip if your app provides an in-the-moment experience that helps people perform a task over a finite amount of time. For example:
•
A rental bike could come with an App Clip Code that people tap or scan to launch an App Clip that lets them rent the bike.
•
A coffee shop could offer an App Clip for fast advance orders that customers launch from a Smart App Banner or an App Clip card on the shop’s website. Customers could share a link to the website from the Messages app, which recipients then tap to launch the App Clip from within Messages.
•
A food truck could create marketing material (for example, a poster to promote a seasonal dish) that includes an App Clip Code. People can scan the App Clip Code with the Camera app on their device and instantly launch the App Clip to order the seasonal dish.
•
A restaurant could let diners pay for a meal by launching an App Clip from the Maps app or a suggestion from Siri Suggestions, or by holding their device close to an App Clip Code or NFC tag at their table.
•
A museum could have visitors scan App Clip Codes or QR codes on labels next to displayed works to launch an App Clip that reveals augmented reality content or provides audio commentary.
An App Clip is a great way to share some of your app’s features with people who haven’t installed the app. For developer guidance, see App Clips.
Focus on essential features. Interactions with App Clips are quick and focused. Limit features to what’s necessary to accomplish the task at hand. Reserve advanced or complex features for the app.
Don’t use App Clips solely for marketing purposes. App Clips need to provide real value and help people accomplish tasks. Don’t use them as a means to advertise services or products, and don’t display ads in your App Clip.
Avoid using web views in your App Clip. App Clips use native components and frameworks to offer an app-quality experience. If only web components are available to you, offer a quick link to your website instead of an App Clip.
Design a linear, easy-to-use, and focused user interface. App Clips don’t need tab bars, complex navigation, or settings. Keep the number of screens and entry forms to a minimum. Remove extraneous information and reduce complexity in the user interface wherever possible.
On launch, show the most relevant part of your App Clip. Skip unnecessary steps and take people immediately to the part of the App Clip that best fits their context.
Ensure people can use your App Clip immediately. App Clips need to include all required assets, omit splash screens, and never make people wait on launch.
Ensure your App Clip is small. The smaller your App Clip, the faster it will launch on a person’s device. Keeping your App Clip small is especially important when bandwidth is limited. As much as possible, reduce unnecessary code and remove unused assets. Avoid downloading additional data, which can take away the feeling of immediacy.
Make the App Clip shareable. When someone shares a link to an App Clip in the Messages app, recipients can launch the App Clip from within the Messages app. Offer the ability to share links to specific points in your App Clip, and encourage people to share the App Clip with others.
Make it easy to pay for a service or product. Entering payment information can be a long and error-prone task. Consider supporting Apple Pay to offer express checkout and let people enter shipping information with no typing.
Avoid requiring people to create an account before they can benefit from your App Clip.Creating an account is a complex task that takes time and effort. Consider not requiring an account, or think about asking people to create an account after they finish a task. If your App Clip requires an account to provide value, limit the amount of information people need to provide — for example, by offering Sign in with Apple.
Provide a familiar, focused experience in your app. When people install the full app, it replaces the App Clip on their device. From this moment, invocations that would have launched the App Clip launch the full app instead. Ensure your app provides a focused, familiar experience to people who previously used the App Clip. Don’t require additional steps that slow people down; for example, don’t require people to log in again when they transition from the App Clip to the app.
The system imposes limits on App Clips to ensure people’s privacy. For example, App Clips can’t perform background operations. For developer guidance, see Choosing the right functionality for your App Clip.
Limit the amount of data you store and handle yourself. If you need to store people’s data — for example, login information — store it securely. In addition, don’t rely on the availability of data you previously stored on the device — the system may have removed the App Clip from the device between launches and deleted all of its data. If you store login information, securely store it off the device.
Consider offering Sign in with Apple. Sign in with Apple securely retains login information off people’s devices and preserves their privacy. For guidance, see Sign in with Apple.
Offer a secure way to pay for services or goods that also respects people’s privacy. For example, consider offering Apple Pay.
People don’t manage App Clips themselves, and App Clips don’t appear on the Home screen. Instead, the system removes an App Clip after a period of inactivity.
Because apps remain the best way to keep people engaged over time, the system helps them discover and install the full app:
•
On the App Clip card, people can either launch the App Clip or visit the full app’s page on the App Store.
•
When people first launch the App Clip, the system displays an app banner at the top of the screen. Like the App Clip card, the banner allows people to visit the app’s page on the App Store.
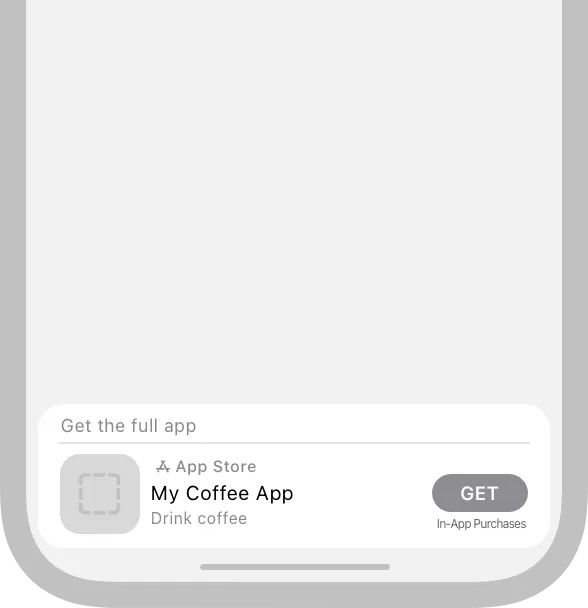
In addition, you can display an overlay in your App Clip that allows people to download the full app from within the App Clip.

The following guidance can help you find a good time to recommend your app to people.
Don’t compromise the user experience by asking people to install the full app. Instead, consider whether the App Clip card and the system-provided app banner provide enough incentive for people to download the full app. App Clips don’t require people to install the full app to complete a task.
Pick the right time to recommend your app. Give people the opportunity to try out your App Clip and understand its value. Only recommend the full app to people who use your App Clip repeatedly, or after they complete a task.
Recommend your app in a nonintrusive, polite way. Don’t ask people to install the full app repeatedly or interrupt them during a task. Push notifications aren’t a good way to ask people to install the app either. Clearly communicate your app’s additional features.
App Clips provide the option to schedule and receive notifications for up to 8 hours after launch, enough time to follow up and complete most common tasks.
Only ask for permission to use notifications for an extended period of time if it’s really needed. If your App Clip’s functionality spans more than a day, explicitly request permission to schedule and receive notifications. For example, a car rental company’s App Clip can ask for permission to send a notification that reminds people that they need to return a rented car soon.
Keep notifications focused. Don’t send purely promotional notifications, and only use notifications in response to an explicit user action. If a person completes their task without leaving the App Clip, you might not need to send any notifications at all.
Use notifications to help people complete a task. Notifications for an App Clip relate directly to the task the App Clip helps to accomplish. For example, an App Clip that helps people order food could send notifications related to a scheduled delivery.
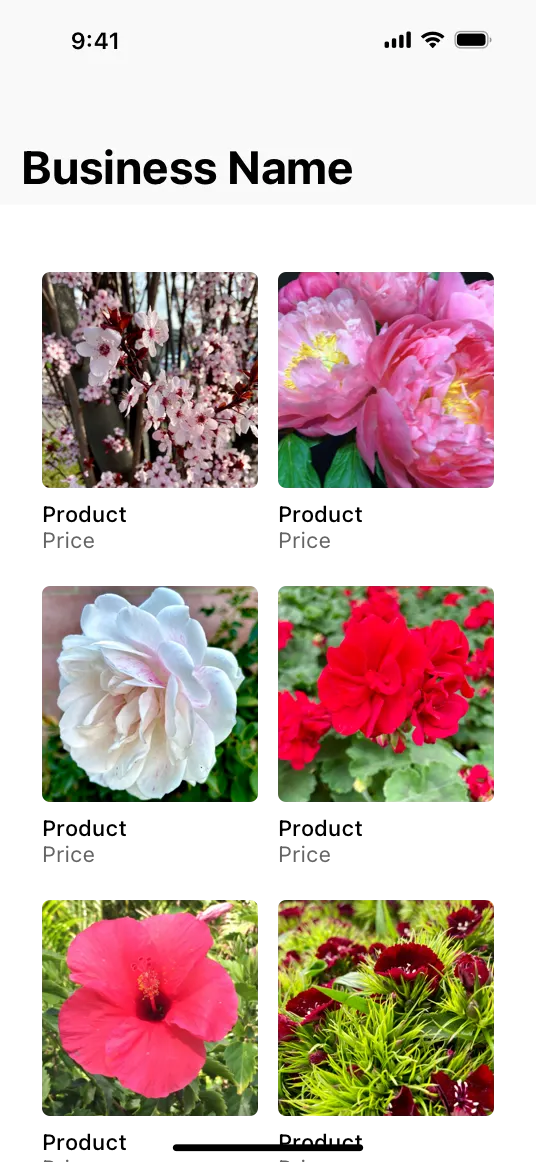
If you’re a platform provider who services businesses, you may create several App Clip experiences in App Store Connect and use a single App Clip to power them all. To people using the App Clip, it appears with the branding of an individual business or location instead of your own branding.
Use consistent branding. When people see the App Clip card for a business, the brand for that business is front and center. Tone down your own branding and make sure the branding for the business is clearly visible to avoid confusing people when they enter the App Clip experience.
Consider multiple businesses. An App Clip may power many different businesses or a business that has multiple locations. In both scenarios, people may end up using the App Clip for more than one business or location at a time. The App Clip must handle this use case and update its user interface accordingly. For example, consider a way to switch between recent businesses or locations within your App Clip, and verify a person’s location when they launch it.
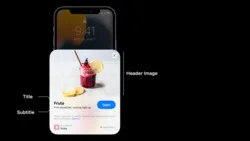
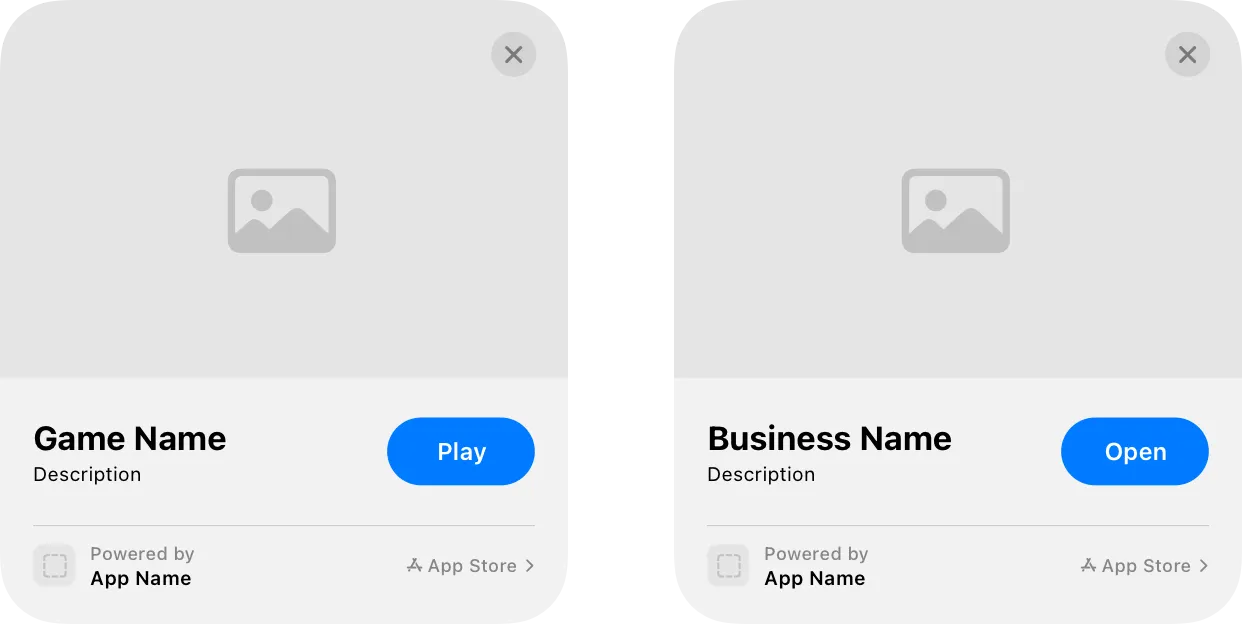
The system-provided App Clip card is people’s first interaction with your App Clip, so give careful consideration to its images and copy.
Be informative. Make sure the image on the App Clip card clearly communicates the features offered by your App Clip, supported tasks, or content.
Prefer photography and graphics. Avoid using a screenshot of your app’s user interface because it’s unlikely to communicate the purpose of your App Clip. Instead, use an image that helps people understand the App Clip’s value, or a photo of the location of its associated business or point of interest.
Avoid using text. Text in the header image isn’t localizable, can be difficult to read, and can make a card image less aesthetically pleasing.
Adhere to image requirements. Use a 1800x1200 px PNG or JPEG image without transparency.
Use concise copy. An App Clip card requires both a title and a subtitle. Clearly express the purpose of your App Clip within the available space so people can read and understand it at a glance. Create a title that has no more than 30 characters and a subtitle that has no more than 56 characters.
Pick a verb for the action button that best fits your App Clip. Possible verbs are View, Play, or Open. Pick View for media, or if your App Clip provides informational or educational content. Pick Play for games. Choose Open for all other App Clips.
App Clip Codes are the best way for people to discover your App Clip. Their distinct design is immediately recognizable, and they offer a fast, secure way to launch your App Clip.
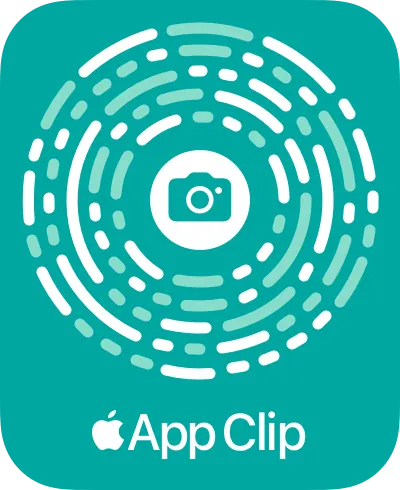
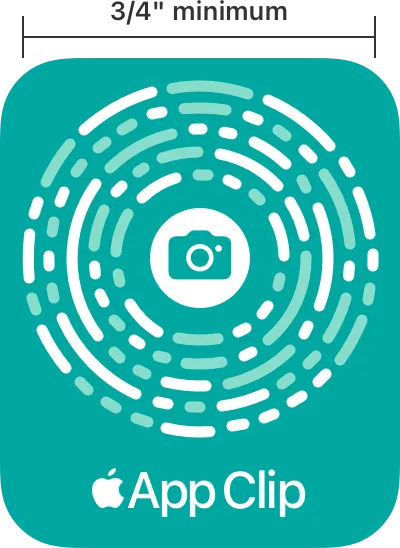
App Clip Code with the App Clip logo
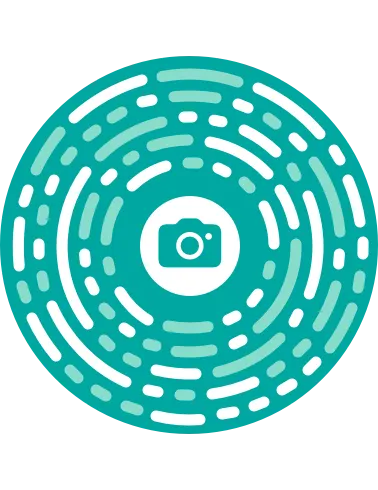
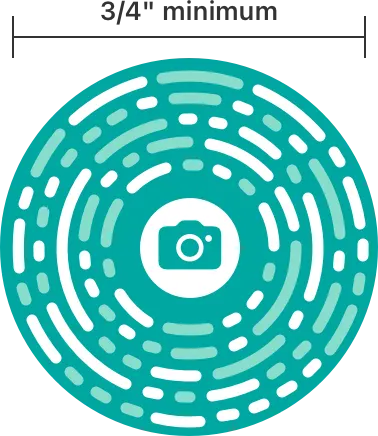
App Clip Code without the App Clip logo
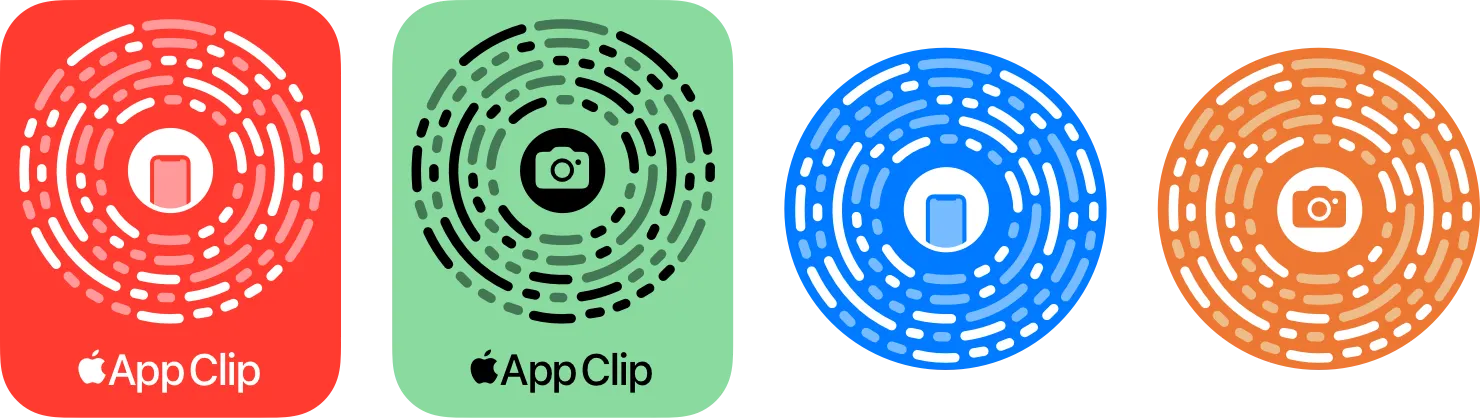
App Clip Codes always use the designs Apple provides and follow size, placement, and printing guidelines. Choose between the badge design that uses the App Clip logo ( App Clip) or, when space is at a premium, a design without it. Create App Clip Codes that use a default color pair, or choose custom foreground and background colors. For developer guidance, see Creating App Clip Codes.
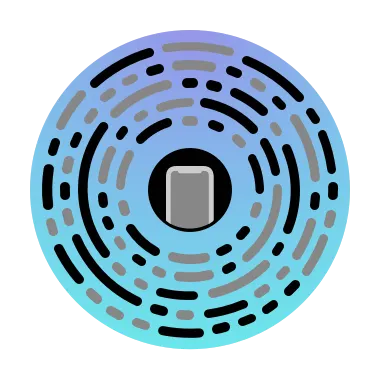
App Clip Codes come in two variants: scan-only or with an embedded NFC tag (NFC-integrated).

The scan-only variant uses a camera icon in its center to let people know to use the Camera app or the Code Scanner in Control Center to scan the App Clip Code. The NFC-integrated variant uses an iPhone icon at its center that guides people to hold their device close to the App Clip Code or to scan it using the NFC Tag Reader in Control Center. People can also scan an NFC-integrated App Clip Code with the Camera app or the Code Scanner in Control Center. For example:
•
A coffee shop could place an App Clip Code on their menu. A guest could hold their device close to the App Clip Code and instantly launch the shop’s App Clip to order a drink.
•
A gas station could have an NFC-integrated App Clip Code attached to each pump. A traveler could hold their device close to it to launch the gas station’s App Clip and use it to pay for their refill.
•
A video game creator could hand out marketing material at an industry event that includes an App Clip Code. An event attendee could scan the code to launch an App Clip that’s a playable demo of their latest video game.
When you start designing your App Clip Codes, choose the variant that works best for the way people use your App Clip. If people can physically access the App Clip Code, use the NFC-integrated variant. For example:
•
On a tabletop at a restaurant
•
Near a register at a retail store
•
In a storefront window
•
On signage
•
On a gift card or coupon
If you need to place your App Clip Code in an area that’s physically inaccessible or you need to display it digitally, use a scan-only App Clip Code. For example:
•
On posters or printed advertising
•
On signage behind a counter or unreachable in a storefront
•
On digital materials such as digital displays, in emails, or on images you post to social media
No matter which of the two variants you use, it’s important you carefully consider where you place your App Clip Code to ensure a reliable scanning experience.
Include the App Clip logo when space allows. The logo helps make it clear that the code launches an App Clip; however, if you can’t meet the clear space requirements, use the App Clip Code design without the App Clip logo. Also, use the design without the App Clip logo if you place the App Clip Code on disposable paper or plastic items, or on items associated with gambling or drinking. For example, use the App Clip Code without the App Clip logo on playing cards, poker chips, or bar coasters. The App Clip logo is always part of the badge design where it appears below the App Clip Code; never use the App Clip logo on its own.
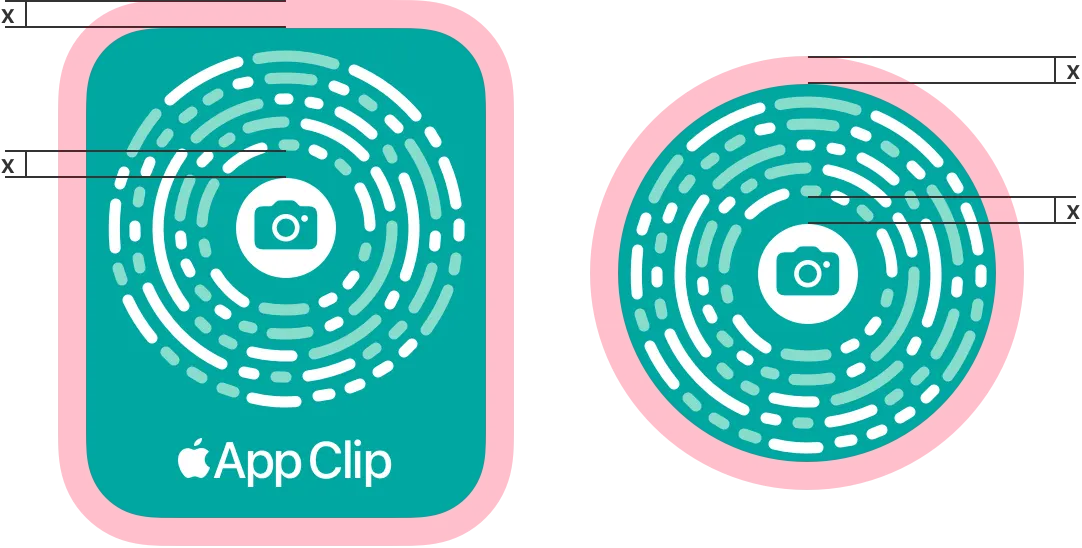
Place your App Clip Code on a flat or cylindrical surface only. If you place your App Clip Code on a cylindrical surface — for example, on a scooter’s handlebar — make sure the width of the App Clip Code doesn’t exceed one-sixth of the cylinder’s circumference.

Help your App Clip Code remain as flat as possible so it’s easy for people to scan. To provide the best scanning experience, avoid displaying App Clip Codes on deformable materials that readily fold or crumple, such as paper, plastic, or fabric. If you need to make your App Clip Code available on a bag, flexible box, or other deformable object, display it on something rigid — like a card — that you attach to the object. If you create an App Clip Code sticker, make sure it adheres well to flat surfaces.
Place your App Clip Code in a location that helps ensure reliable scanning. For example, place a scan-only App Clip Code in a location that offers enough light to ensure reliable scanning, and don’t require people to scan from a wide angle.
Make sure the App Clip Code is unobstructed. Don’t overlay the App Clip Code with text, logos, or images. Never animate the App Clip Code or dim it.
Display the App Clip Code in an upright position. Don’t rotate the generated App Clip Code or display the center glyph at an angle.


Don’t create App Clip Codes that are too small. App Clip Codes must adhere to the following specifications.
Type | Minimum size |
Printed communications | Minimum diameter of 3/4 inch (1.9 cm). |
Digital communications | Minimum size of 256×256 px. Use a PNG or SVG file. |
NFC-integrated App Clip Code | The embedded NFC tag needs to be at least 35 mm in diameter or of equivalent size. For example, if your embedded NFC tag is 35 mm in diameter, your printed App Clip Code needs to be at least 1.37 inches (3.48 cm) in diameter. |
When determining the dimensions of your App Clip Codes, consider a distance to code size ratio of no more than 20:1. If possible, use a ratio of 10:1 to ensure reliable scanning. For example, an App Clip that people scan from 40 inches (101 cm) away needs to be at least 4 inches (10.16 cm) in diameter.
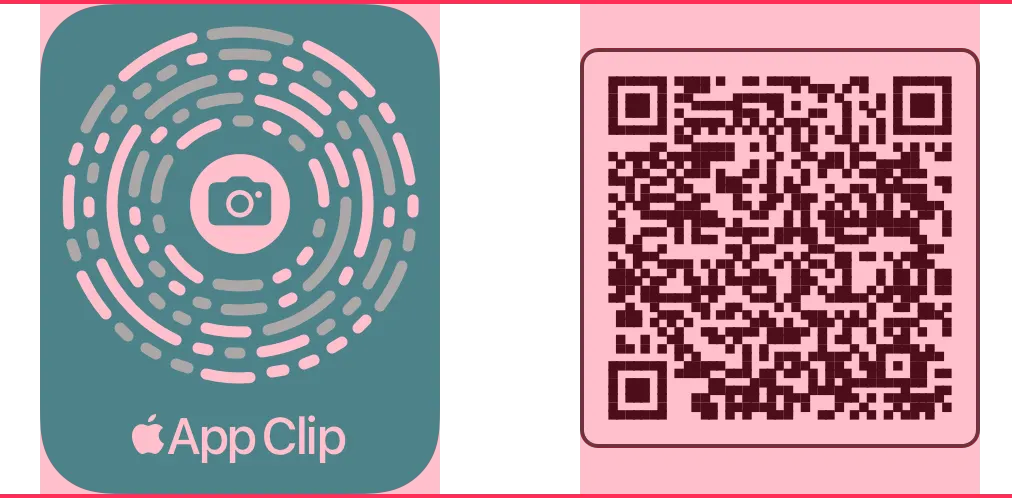
If you display an App Clip Code near a QR Code or other scannable item, choose a size for the App Clip Code that’s at least the other code’s or item’s size.
Provide enough space between an App Clip Code and adjacent App Clip Codes, graphics, or materials. The minimum clear space around an App Clip Code is equal to the space between the center glyph and the circular code. If you place your App Clip Code next to another App Clip Code or other machine-readable code, leave enough clear space to allow for reliable scanning of each code.
Add clear messaging that informs people how they can use the App Clip Code to launch your App Clip, especially if you use the design without the App Clip logo. For example, add a call to action next to an App Clip Code you display in an email or on a poster. Use the suggested call-to-action messaging or your own copy. Always use a simple, clear call to action.

For a scan-only App Clip Code, you can use the following call to action:
•
Scan to [describe what people can do with your App Clip].
•
Scan using the camera on your iPhone or iPad to [describe what people can do with your App Clip].
For an NFC-integrated App Clip Code, you can use the following call to action:
•
Scan to [describe what people can do with your App Clip].
•
Hold your iPhone near the [object name] to launch an App Clip that [describe what a person can do with your App Clip].
Adhere to Guidelines for Using Apple Trademarks when referring to your App Clip and App Clip Codes. For example, Apple trademarks can’t appear in your app name or images, always use title case when using the terms App Clips or App Clip Code, and so on. For additional information, see Legal requirements.
Use App Store Connect or the App Clip Code Generator command-line tool to create App Clip Codes, and follow best practices to ensure a reliable scanning experience.
Always use the generated App Clip Code. Don’t create your own App Clip Code design or modify a generated App Clip Code in any way. Don’t apply filters, augment its colors, or add glows, shadows, gradients, or reflections. They negatively impact people’s scanning experience. When scaling a generated App Clip Code, don’t change the generated code’s aspect ratio, and be sure to scale all attributes of the App Clip Code — for example the stroke widths.


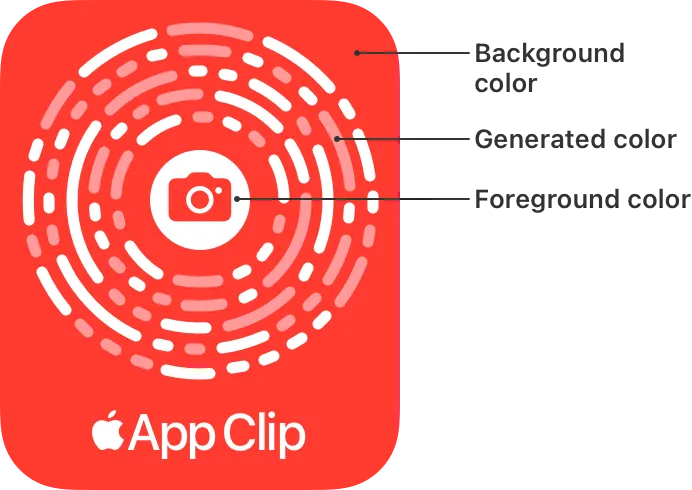
Choose colors with enough contrast that ensure accurate scanning. Each App Clip Code uses three colors: a foreground color, a background color, and a third color that’s generated for you based on the foreground and background colors. Both App Store Connect and the App Clip Code Generator command-line tool offer a selection of default color pairs. Alternatively, you can choose custom foreground and background colors. Note that you can’t choose custom colors that will lead to a suboptimal scanning experience. If your color selection doesn’t work well, neither App Store Connect nor the command-line tool will generate an App Clip Code. To help you choose a color combination that works well, both tools contain functionality to suggest a different foreground color based on your custom background color. For more information, see Creating App Clip Codes with the App Clip Code Generator and Creating App Clip Codes with App Store Connect.
App Clip Codes offer the best experience to launch App Clips. As a result, it’s important to manufacture and display App Clip Codes that offer a reliable scanning experience for a long time. You can print App Clip Codes yourself, or work with a professional printing service — for example, RR Donnelley.
Always test printed App Clip Codes before you distribute them to be sure they’re scannable from a variety of angles.
Use high-quality, non-textured print materials. Print App Clip Codes on matte finishes. Avoid shine, gloss, reflective or holographic overlays, as well as thin laminate finishes or materials. In case you need to laminate print material with an App Clip Code on it, use a matte laminate to avoid shine and reflections. If you place your App Clip Code outdoors, use UV-resistant materials or coatings to prevent fading from exposure to sunlight, rain, and other weather conditions. If you work with a professional printing service, use flexographic printing for best results. If you print the App Clip Codes yourself using a desktop printer, use an inkjet printer for best results.
Use high-resolution images and printer settings. When rasterizing the SVG file, set the image resolution to at least 600 ppi, and print your App Clip Codes with a minimum resolution of 300 dpi. Consider leveling and calibrating your printer before printing to ensure a high print quality, and avoid poor color channel alignment, inaccurate gamma values, artifacts, or printing elliptical or otherwise distorted App Clip Codes. When using receipt printers, print App Clip Codes as close to the paper’s maximum bounds as possible.
Use correct color settings when you convert the generated SVG file to a CMYK image. Both the App Clip Code Generator command-line tool and App Store Connect generate App Clip Codes as SVG files in the sRGB color space. To print colors that match the SVG file, convert the sRGB image to a CMYK image. Use a relative calorimetric (media-relative) intent when performing the conversion. Use “Generic CMYK ICC profile” on CMYK printers or “Gracol 2013 ICC profile” on CMYKOV printers and allow for a color tolerance CIELab Delta E of 2.5.
If you’re using a printer that only prints in grayscale, only generate grayscale App Clip Codes. Codes generated in color and then printed in grayscale may work less reliably.
For NFC-integrated App Clip Codes, choose Type 5 NFC tags. The embedded NFC tag needs to be at least 35 mm in diameter or of equivalent size.
If you create large batches of App Clip Codes, thoroughly test your printing workflow, and verify printed App Clip Codes. For example, conduct small, inexpensive print runs using a subset of codes. Print your App Clip Codes on print templates with additional padded regions that allow you to display the encoded invocation URL and the SVG filename alongside each code for validation at the time of print.
If you create many App Clip Codes with the App Clip Code Generator tool or App Store Connect, you’ll likely work with a professional printing service. If this is the case, you need to handle a lot of SVG files. Because you have no way of knowing which App Clip Code encodes which URL by looking at an App Clip Code, you need to use a file that contains information about which SVG file maps to which invocation URL. Under any circumstance, careful file management, versioning, and change tracking are key to avoiding faulty print runs. For more information, see Preparing multiple App Clip Codes for production.
A reliable scanning experience depends on the quality of your printed App Clip Codes. To ensure printing App Clip Codes results in a reliable scanning experience and to avoid using a printer that can’t print high-quality App Clip Codes, Apple offers printer calibration test sheets you can use to verify your printer’s settings and print quality.
Verify print quality of your chosen color pair with the printer calibration test sheet that shows text boxes for each default color pair. Follow the instructions on the sheet to print it at the right scale and to verify that your printer can create high-quality App Clip Codes.
Verify your printer’s grayscale settings by printing the printer calibration test sheet that shows two grayscale bars. If any of the specific gray colors are light or entirely missing, the printer may need calibration or may not be suitable for printing an App Clip Code that allows for reliable scanning.
Only the Apple-provided App Clip Codes created in App Store Connect or with the App Clip Code Generator command-line tool and that follow these guidelines are approved for use.
App Clip Codes are approved for use to indicate availability of an App Clip. Apple may update the App Clip Code design from time to time at Apple’s discretion.
In the event your App Clip is no longer active, also stop displaying the App Clip Code associated with that inactive App Clip.
You may not use the App Clip Code (including, without limitation, the Apple Logo, the App Clip mark, and the App Clip Code designs) as part of your own company name or as part of your product name. You may not seek copyright or trademark registration for the App Clip Codes or any elements contained therein.
The App Clip Codes described in these guidelines must not be used in any manner that is likely to reduce, diminish, or damage the goodwill, value, or reputation associated with Apple or App Clips; or that infringes or violates the trademarks or other proprietary rights of any third party; or that is likely to cause confusion as to the source of products or services.
Apple retains all rights to its trademarks, copyrights, or other intellectual property rights contained in the materials provided for use hereunder, including, without limitation, the App Clip Codes and any elements contained therein.
Don’t add a symbol to App Clip Codes created in App Store Connect or with the App Clip Code Generator command-line tool.
Don’t translate any Apple trademark. Apple trademarks must remain in English even when they appear within text in a language other than English. With Apple’s approval, a translation of the legal notice and credit lines (but not the trademarks) can be used in materials distributed outside the U.S.
No additional considerations for iOS or iPadOS. Not supported in macOS, tvOS, visionOS, or watchOS.