
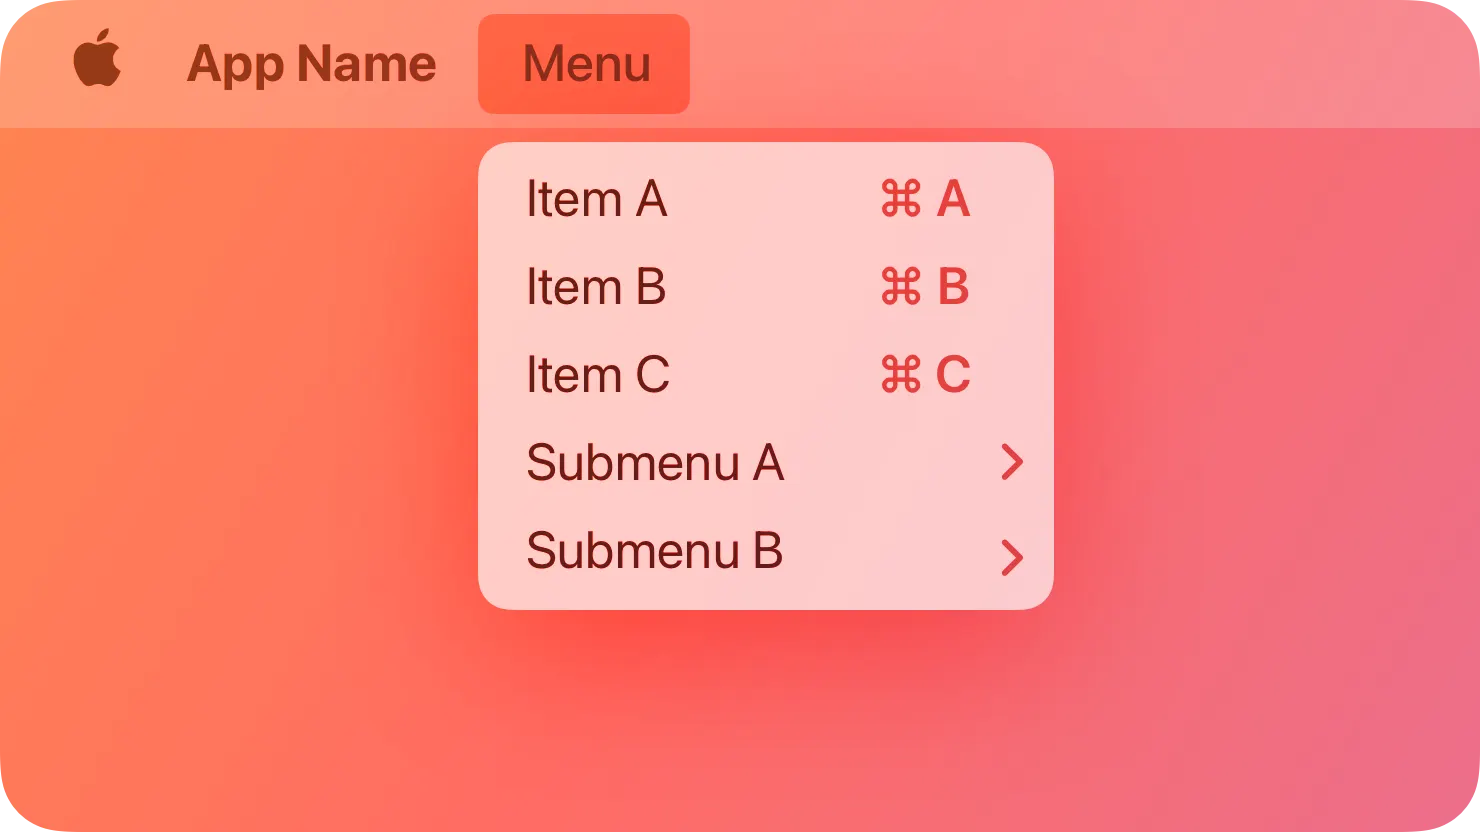
On a Mac, the menu bar at the top of the screen displays the top-level menus in your app or game, which typically include both system-provided menus and custom ones.
Mac에서는 화면 상단의 메뉴 막대가 앱이나 게임의 최상위 메뉴를 표시하며, 시스템에서 제공하는 메뉴와 커스텀 메뉴를 일반적으로 포함합니다.
Mac users are very familiar with the macOS menu bar, and they rely on it to help them learn what an app does and find the commands they need. To help your app or game feel at home in macOS, it’s essential to provide a consistent menu bar experience.
macOS의 메뉴 막대는 사용자들이 앱의 기능을 파악하고 필요한 작업을 찾는 데 도움이 되므로, macOS에서 일관된 메뉴 막대 경험을 제공하는 것이 중요합니다.

Note
In iPadOS, an app’s keyboard shortcuts can appear in the shortcut interface that displays when people hold the Command key on an attached hardware keyboard. The shortcut interface is similar in appearance and organization to the menu bar in macOS — and it can contain familiar menu items like New Window and Copy — but unlike the menu bar, it doesn’t contain every command an app supports. For guidance, see Keyboard shortcuts.
iPadOS에서는 하드웨어 키보드를 연결해 Command 키를 꾹 누르면 앱의 키보드 단축키가 단축키 인터페이스에 나타날 수 있습니다. 단축키 인터페이스는 일반적으로 macOS의 메뉴 막대와 비슷한 외관 및 구성을 가지며, 새 창 또는 복사와 같은 익숙한 메뉴 항목을 포함할 수 있지만, 앱이 지원하는 모든 단축키를 나타내지는 않습니다. 자세한 지침은 Keyboard shortcuts를 참조하세요.
Menus in the menu bar share most of the appearance and behavior characteristics that all menu types have. To learn about menus in general — and how organize and label menu items — see Menus.
메뉴 막대의 메뉴는 일반적으로 모든 메뉴 유형이 가지는 모양과 동작 특성의 대부분을 공유합니다. 일반적인 메뉴 및 메뉴 항목을 구성하고 레이블을 지정하는 방법에 대한 자세한 내용은 Menus를 참조하세요.
→ 메뉴 막대의 메뉴는 공통적으로 사용되는 항목이 많습니다.
The Apple menu, which is always the first item on the leading side of the menu bar, includes system-defined menu items that are always available. You can’t modify or remove the Apple menu.
Apple menu는 항상 메뉴 막대에서 첫 번째 항목으로 나타나며 항상 사용 가능한 시스템 정의 메뉴 항목을 포함합니다. 이 메뉴는 수정하거나 제거할 수 없습니다.
*Apple menu: macOS의 상단 왼쪽 가장자리의 애플 아이콘으로 표시됩니다.
When present in the menu bar, the following menus appear after the Apple menu in the order listed below.
기타 메뉴들을 Apple menu 뒤에 나타나며 아래와 같은 순서로 표시됩니다.
•
AppName (you supply a short version of your app’s name for this menu’s title)
•
File
•
Edit
•
Format
•
View
•
App-specific menus, if any
•
Window
•
Help
•
앱 이름(직접 지정한 앱 이름의 간략한 버전을 메뉴 제목으로 제공합니다.)
•
파일
•
편집
•
포맷
•
보기
•
앱 별 메뉴(있는 경우)
•
윈도우
•
도움말
Space permitting, the system can display menu bar extras in the trailing end of the menu bar. A menu bar extra provides a menu of app- or system-defined items that people can access in most contexts. With the exception of essential menu bar extras, like Clock, people choose the menu bar extras they want to keep in the menu bar. For example, people might want to include the system-provided Bluetooth menu bar extra to help them manage Bluetooth connections at any time. For guidance, see Menu bar extras.
메뉴 막대에 여유 공간이 있다면, 시스템은 메뉴 막대 끝에 메뉴 막대 엑스트라를 표시할 수 있습니다. 메뉴 막대 엑스트라(아래에서 설명됩니다) 는 대부분의 상황에서 사용자가 사용할 수 있는 앱 또는 시스템 정의 항목의 메뉴를 제공합니다. 시계와 같은 필수 메뉴 막대 엑스트라를 제외하고, 사용자는 메뉴 막대에 보관하고 싶은 메뉴 막대 엑스트라를 선택할 수 있습니다. 예를 들어, 블루투스 연결을 관리할 수 있도록 시스템에서 제공하는 블루투스 메뉴 막대 엑스트라를 메뉴 막대에 추가할 수 있습니다. 자세한 지침은 Menu bar extras를 참고하세요.
역자 첨언
When menu bar space is constrained, the system prioritizes the display of menus and essential menu bar extras. To ensure that menus remain readable, the system may decrease the space between the titles, truncating them if necessary.
메뉴 막대에 공간이 제한되는 경우, 시스템은 메뉴와 필수 메뉴 막대 엑스트라가 표시되는 것을 우선시합니다. 메뉴가 남아있도록 제목들 사이의 공간을 줄이고, 필요하다면 단어를 조금씩 잘라내기도 합니다.
When people enter full-screen mode, the menu bar typically hides until they reveal it by moving the pointer to the top of the screen. For guidance, see Going full screen.
전체 화면 모드로 전환하면 일반적으로 메뉴 막대가 숨겨지고 마우스를 화면 상단으로 이동할 때까지 나타나지 않습니다.
Support the system-defined menus and menu items that are relevant in your app. People generally expect to find familiar menus and menu items in the apps and games they use. In many cases, the system implements the functionality of standard menu items so you don’t have to. For example, when people select text in a standard text field, the system makes the Edit > Copy menu item available.
앱에서 시스템에서 정의한 메뉴 및 메뉴 항목을 사용할 수 있도록 지원하세요. 사용자들은 일반적으로 그들이 사용하는 앱과 게임에서 친숙한 메뉴 및 메뉴 항목을 사용하는 것을 기대합니다. 대부분 시스템이 표준 메뉴 항목의 기능을 구현하므로 직접 개발할 필요는 없습니다. 예를 들어, 사용자가 표준 텍스트 필드에서 텍스트를 선택하면 시스템은 편집 > 복사 메뉴 항목을 사용할 수 있게 합니다.
Prefer using the default ordering of menu bar menus and the default ordering of menu items within each menu. It’s easier for people to find what they’re looking for when your menus and menu items use the ordering they expect.
메뉴 막대의 메뉴와 그 안의 항목들의 기본 순서를 지키는 것이 좋습니다. 메뉴 및 메뉴 항목이 사용자들이 예상하는 순서를 지켜 나열돼 있으면 항목을 찾기가 수월해집니다.
Support the keyboard shortcuts defined for the standard menu items you include. People expect to use the keyboard shortcuts they already know for standard menu items, like Copy, Cut, Paste, Save, and Print. Define custom keyboard shortcuts only when necessary.
표준 메뉴 항목에 정의된 키보드 단축키를 지원하세요. 사용자들은 복사, 잘라내기, 붙이기, 저장하기, 프린트 등과 같은 표준 메뉴 항목에 이미 알고 있는 키보드 단축키를 사용하기를 기대합니다. 필요한 경우에만 커스텀 단축키를 정의하세요.
Prefer short, one-word menu titles. Various factors — like different display sizes and the presence of menu bar extras — can affect the spacing and appearance of your menus. One-word menu titles work especially well in the menu bar because they take little space and are easy for people to scan. Consider the following guidance as you write a menu title.
짧고 한 단어로 된 메뉴 제목을 지향하세요. 디스플레이 크기나 메뉴 막대 엑스트라의 존재가 메뉴의 간격 또는 외관에 영향을 줄 수 있습니다. 한 단어로 된 메뉴 제목은 적은 공간을 차지하고 탐색이 쉬운 장점이 있습니다. 메뉴 제목을 선정할 때 다음 가이드를 고려하세요.
•
Aim for a title that helps people predict the items within the menu. For example, a menu labeled “Font” implies that it lists items for adjusting text attributes, not for performing edit actions like copy and paste.
•
메뉴 내의 항목을 예측할 수 있는 제목을 지향하세요. 예를 들어, “폰트”라는 제목의 메뉴는 복사, 붙여넣기와 같은 동작이 아닌 텍스트 속성을 적용하는 항목들을 나열할 것을 예상해 볼 수 있습니다.
•
Avoid mixing text with symbols or interface icons in a menu title. Only a menu bar extra uses a symbol or icon as a title.
•
텍스트에 기호 또는 인터페이스 아이콘을 혼합해 사용하지 마세요. 메뉴 막대 엑스트라만 제목으로 기호 또는 아이콘을 사용할 수 있습니다.
•
Use title-style capitalization if you need to use more than one word in the menu title.
•
두 단어 이상을 사용해야 하는 경우 제목 스타일 대문자 형식을 사용하세요.
The app menu lists items that apply to your app or game as a whole, rather than to a specific task, document, or window. To help people quickly identify the active app, the menu bar displays your app name in bold.
앱 메뉴에는 특정 작업이나 문서, 또는 윈도우와 관련없는 앱이나 게임 전체에 적용되는 항목을 나열합니다. 활성돼 있는 앱을 빠르게 식별하기 위해 메뉴 바는 앱 이름을 볼드체로 표시해 줍니다.
The app menu typically contains the following menu items listed in the following order.
일반적으로 앱 메뉴에는 다음과 같은 메뉴 항목이 포함됩니다.
역자 첨언
Menu item | Action | Guidance |
About YourAppName | Displays the About window for your app, which includes copyright and version information | Prefer a short name of 16 characters or fewer. Don’t include a version number. |
Settings… | Use only for app-level settings. If you also offer document-specific settings, put them in the File menu. | |
Optional app-specific items | Performs custom app-level setting or configuration actions | List custom app-configuration items after the Settings item and within the same group. |
Services | Displays a submenu of services from the system and other apps that apply to the current context | |
Hide YourAppName | Hides your app and all of its windows, and then activates the most recently used app | Use the same short app name you supply for the About item. |
Hide Others | Hides all other open apps and their windows | |
Show All | Shows all other open apps and their windows behind your app’s windows | |
Quit YourAppName | Quits your app. Pressing Option changes Quit YourAppName to Quit and Keep Windows. | Use the same short app name you supply for the About item. |
메뉴 항목 | 동작 | 가이드 |
‘앱 이름’ 소개 | 저작권, 버전 정보를 포함한 앱에 대한 소개를 표시합니다. | 16자 이하의 짧은 이름을 지향하세요. 버전 정보를 포함하지 마세요. |
설정… | 앱 설정 윈도우를 엽니다. | 앱 설정에 대한 것만 사용하세요. 앱이 사용하는 문서와 관련된 설정은 파일 메뉴에 넣으세요. |
추가적인 앱 전용 항목 | 커스텀 앱 수준의 설정 또는 구성 작업을 진행합니다. | 설정 항목 다음에 커스텀 앱 구성 항목을 나열하세요. |
서비스 | 현재 컨텍스트에 적용되는 시스템 또는 다른 앱의 서비스를 보여주는 하위 메뉴를 표시합니다. | |
앱 숨기기 | 앱의 윈도우를 모두 숨기고, 최근에 사용한 앱을 활성화합니다. | 소개에 사용한 앱 이름과 동일한 앱 이름을 사용하세요. |
다른 항목 숨기기 | 다른 모든 열린 앱과 윈도우를 숨깁니다. | |
모두 표시하기 | 현재 앱 윈도우 뒤에 있는 모든 다른 열린 앱과 윈도우를 표시합니다. | |
끝내기 | 앱을 종료합니다. Option 키를 누르면 ‘끝내기’ 가 ‘종료 및 윈도우 유지’로 바뀝니다. | 소개에 사용한 앱 이름과 동일한 앱 이름을 사용하세요. |
Display the About menu item first. Include a separator after the About menu item so that it appears by itself in a group.
‘소개’ 메뉴 항목을 먼저 표시하세요. 이 항목 다음에는 구분선을 넣어 다른 항목들의 그룹과 구분되도록 하세요.
The File menu contains commands that help people manage the files or documents an app supports. If your app doesn’t handle any types of files, you can rename or eliminate this menu.
파일 메뉴는 앱이 지원하는 파일이나 문서를 관리하는 데 도움이 되는 명령어를 포함합니다. 앱이 어떠한 유형의 파일도 처리하지 않는 경우, 이 메뉴의 이름을 변경하거나 제거할 수 있습니다.
The File menu typically contains the following menu items listed in the following order.
일반적으로 파일 메뉴에는 다음과 같은 메뉴 항목이 포함되어 있습니다.
역자 첨언
Menu item | Action | Guidance |
New Item | Creates a new document, file, or window | For Item, use a term that names the type of item your app creates. For example, Calendar uses Event and Calendar. |
Open | Can open the selected item or present an interface in which people select an item to open | If people need to select an item in a separate interface, an ellipsis follows the command to indicate that more input is required. |
Open Recent | Displays a submenu that lists recently opened documents and files that people can select, and typically includes a Clear Menu item | List document and filenames that people recognize in the submenu; don’t display file paths. List the documents in the order people last opened them, with the most recently opened document first. |
Close | Closes the current window or document. Pressing Option changes Close to Close All. For a tab-based window, Close Tab replaces Close. | In a tab-based window, consider adding a Close Window item to let people close the entire window with one click or tap. |
Close Tab | Closes the current tab in a tab-based window. Pressing Option changes Close Tab to Close Other Tabs. | |
Close File | Closes the current file and all its associated windows | Consider supporting this menu item if your app can open multiple views of the same file. |
Save | Saves the current document or file | Automatically save changes periodically as people work so they don’t need to keep choosing File > Save. For a new document, prompt people for a name and location. If you need to let people save a file in multiple formats, prefer a pop-up menu that lets people choose a format in the Save sheet. |
Save All | Saves all open documents | |
Duplicate | Duplicates the current document, leaving both documents open. Pressing Option changes Duplicate to Save As. | Prefer Duplicate to menu items like Save As, Export, Copy To, and Save To because these items don’t clarify the relationship between the original file and the new one. |
Rename… | Lets people change the name of the current document | |
Move To… | Prompts people to choose a new location for the document | |
Export As… | Prompts people for a name, output location, and export file format. After exporting the file, the current document remains open; the exported file doesn’t open. | Reserve the Export As item for when you need to let people export content in a format your app doesn’t typically handle. |
Revert to | When people turn on autosaving, displays a submenu that lists recent document versions and an option to display the version browser. After people choose a version to restore, it replaces the current document. | |
Page Setup… | Opens a panel for specifying printing parameters like paper size and printing orientation. A document can save the printing parameters that people specify. | Include the Page Setup item if you need to support printing parameters that apply to a specific document. Parameters that are global in nature, like a printer’s name, or that people change frequently, like the number of copies to print, belong in the Print panel. |
Print… | Opens the standard Print panel, which lets people print to a printer, send a fax, or save as a PDF |
메뉴 항목 | 동작 | 가이드 |
신규 ‘항목’ | 새 문서, 파일, 또는 윈도우를 생성합니다. | ‘항목’에는 앱이 생성하는 항목 유형을 나타내는 용어를 사용하세요. 예를 들어, 캘린더는 캘린더와 이벤트를 사용합니다. |
열기 | 선택된 항목을 열거나 열 항목을 선택할 수 있는 인터페이스가 나타납니다. | 분리된 인터페이스에서 항목을 선택해야 한다면, 입력이 더 요구된다는 것을 뜻하는 ellipsis(…)가 명령어 다음에 붙습니다. |
최근 사용 열기 | 최근에 열었던 문서와 파일을 선택할 수 있는 하위 메뉴를 표시합니다. 이 메뉴에는 ‘메뉴 지우기’ 항목이 일반적으로 포함됩니다. | 하위 항목에서 사용자들이 알아보기 쉽도록 파일 경로보다는 파일 이름을 나열하세요. 가장 최근에 열었던 순으로 나열하세요. |
닫기 | 현재 창 또는 문서를 닫습니다. Option 키를 눌러 ‘닫기’를 ‘모두 닫기’로 변경할 수 있습니다. 탭을 사용하는 창일 경우, ‘닫기’가 ‘탭 닫기’로 대체됩니다. | 탭을 사용하는 창인 경우, ‘창 닫기’ 항목을 추가해 사용자가 전체 창을 닫을 수 있도록 하는 것이 좋습니다. |
탭 닫기 | 탭을 사용하는 창의 현재 탭을 닫습니다. Option 키를 눌러 ‘탭 닫기’를 ‘다른 탭 닫기’로 변경할 수 있습니다. | |
파일 닫기 | 현재 파일과 해당 파일에 관련된 모든 창을 닫습니다. | 해당 앱이 한 파일에 대한 여러 보기를 제공한다면 이 메뉴 항목을 지원하는 것이 좋습니다. |
저장 | 현재 문서 또는 파일을 저장합니다. | 사용자가 작업할 때 변경사항을 주기적으로 저장하므로 파일>저장 을 선택할 필요가 없습니다. 새 문서의 경우 사용자가 문서의 이름과 경로를 지정합니다. 파일을 여러 형식으로 저장해야 하는 경우, 저장 시트에서 형식을 선택할 수 있는 팝업 메뉴를 선호하세요. |
모두 저장 | 열려있는 모든 문서를 저장합니다. | |
복제 | 현재 문서를 복제하고 모두 엽니다. Option 키를 누르면 “복제”가 “별도 저장”으로 변경됩니다. | ‘Save As’, ‘Export’, ‘Copy To’, ‘Save To’ 같은 메뉴 항목 대신 ‘복제’를 선호하세요. 이 항목들은 원본 파일과 새 파일 간의 관계를 명확하게 보여주지 않으므로 피하는 것이 좋습니다. |
이름 변경 | 현재 문서의 이름을 변경합니다. | |
다음으로 이동… | 문서를 이동시킬 새 경로를 지정합니다. | |
다음으로 내보내기 | 사용자에게 이름, 내보낼 경로, 내보낼 파일 형식을 지정하도록 합니다. 파일을 내보낸 후에도 현재 문서는 열린 상태로 유지되고, 내보낸 파일은 열리지 않습니다. | 이 항목은 해당 앱이 일반적으로 처리하지 않는 형식으로 내보내기를 허용해야 하는 경우에만 사용하도록 하세요. |
다음으로 복귀 | 자동 저장을 켜면 최근 문서 버전을 나열하고, 버전 브라우저를 표시하는 옵션을 포함하는 하위 메뉴가 나타납니다. 사용자가 복원한 버전을 선택한 후에는 현재 문서가 해당 버전으로 교체됩니다. | |
페이지 설정… | 인쇄 크기 및 인쇄 방향과 같은 인쇄에 필요한 요소를 지정하는 패널을 엽니다. 문서는 사용자가 지정한 인쇄 요소를 저장할 수 있습니다. | 이 항목은 문서에 적용되는 인쇄 요소를 지원해야 할 때 포함하세요. 프린터 이름처럼 전역적인 성격을 가진 요소나 사용자가 자주 변경하는 복사 횟수같은 경우는 프린트 패널에 포함되어야 합니다. |
프린트… | 프린트하거나, 팩스로 보내거나, PDF로 저장할 수 있는 표준 프린트 패널을 엽니다. |
The Edit menu lets people make changes to content in the current document or text container, and provides commands for interacting with the Clipboard. Because many editing commands apply to any editable content, the Edit menu is useful even in apps that aren’t document-based.
편집 메뉴는 현재 문서나 텍스트 컨테이너의 내용을 변경하며, 클립보드와 상호 작용하는 명령어를 제공합니다. 많은 편집 명령어가 편집 가능한 모든 콘텐츠에 적용되기 때문에, 이 메뉴는 문서 기반이 아닌 앱에서도 유용합니다.
Determine whether Find menu items belong in the Edit menu. For example, if your app lets people search for files or other types of objects, Find menu items might be more appropriate in the File menu.
‘찾기’ 메뉴 항목이 ‘편집’ 메뉴에 속하는지에 대한 여부를 결정하세요. 예를 들어, 사용자가 파일이나 다른 유형의 객체를 검색할 수 있는 경우 ‘찾기’ 메뉴 항목이 ‘파일’ 메뉴에 더 적합할 수 있습니다.
The Edit menu typically contains the following top-level menu items, listed in the following order.
일반적으로 편집 메뉴에는 다음과 같은 상위 메뉴 항목이 포함되며, 아래에 나열된 순서대로 나타납니다.
역자 첨언
Menu item | Action | Guidance |
Undo | Reverses the effect of the previous user operation | Clarify the target of the undo. For example, if people just selected a menu item, you can append the item’s title, such as Undo Paste and Match Style. For a text entry operation, you might append the word Typing to give Undo Typing. |
Redo | Reverses the effect of the previous Undo operation | Clarify the target of the redo. For example, if people just reversed a menu item selection, you can append the item’s title, such as Redo Paste and Match Style. For a text entry operation, you might append the word Typing to give Redo Typing. |
Cut | Removes the selected data and stores it on the Clipboard, replacing the previous contents of the Clipboard | |
Copy | Duplicates the selected data and stores it on the Clipboard | |
Paste | Inserts the contents of the Clipboard at the current insertion point. The Clipboard contents remain unchanged, permitting people to choose Paste multiple times. | |
Paste and Match Style | Inserts the contents of the Clipboard at the current insertion point, matching the style of the inserted text to the surrounding text | |
Delete | Removes the selected data, but doesn’t place it on the Clipboard | Provide a Delete menu item instead of an Erase or Clear menu item. Choosing Delete is the equivalent of pressing the Delete key, so it’s important for the naming to be consistent. |
Select All | Highlights all selectable content in the current document or text container | |
Find | Displays a submenu containing menu items for performing search operations in the current document or text container. Standard submenus include: Find, Find and Replace, Find Next, Find Previous, Use Selection for Find, Jump to Selection | |
Spelling and Grammar | Displays a submenu containing menu items for checking for and correcting spelling and grammar in the current document or text container. Standard submenus include: Show Spelling and Grammar, Check Document Now, Check Spelling While Typing, Check Grammar With Spelling, Correct Spelling Automatically | |
Substitutions | Displays a submenu containing items that let people toggle automatic substitutions while they type in a document or text container. Standard submenus include: Show Substitutions, Smart Copy/Paste, Smart Quotes, Smart Dashes, Smart Links, Data Detectors, Text Replacement | |
Transformations | Displays a submenu containing items that transform selected text. Standard submenus include: Make Uppercase, Make Lowercase, Capitalize | |
Speech | Displays a submenu containing Start Speaking and Stop Speaking items, which control when the system audibly reads selected text | |
Start Dictation | Opens the dictation window and converts spoken words into text that’s added at the current insertion point. The system automatically adds the Start Dictation menu item at the bottom of the Edit menu. | |
Emoji & Symbols | Displays a Character Viewer, which includes emoji, symbols, and other characters people can insert at the current insertion point. The system automatically adds the Emoji & Symbols menu item at the bottom of the Edit menu. |
메뉴 항목 | 동작 | 가이드 |
실행 취소 | 이전 사용자 작업의 효과를 되돌립니다. | 되돌릴 대상을 명확하게 하세요. 예를 들어, 사용자가 방금 메뉴 항목을 선택했다면 항목의 제목을 추가하여 ‘붙여넣기 실행 취소’와 같이 할 수 있습니다. 텍스트 입력 작업의 경우 ‘입력’이라는 단어를 추가하여 ’입력 실행 취소’라고 할 수 있습니다. |
실행 복귀 | 이전의 되돌리기 작업의 효과를 다시 실행합니다. | 다시 실행할 대상을 명확하게 하세요. 예를 들어, 사용자가 방금 메뉴 항목 선택을 되돌렸다면 해당 항목의 제목을 추가하여 ‘붙여넣기 실행 복귀’와 같이 할 수 있습니다. 텍스트 입력 작업의 경우 ‘입력’이라는 단어를 추가하여 ‘입력 실행 복귀’라고 할 수 있습니다. |
잘라내기 | 선택한 데이터를 삭제하고 클립보드에 저장하며, 클립보드의 이전 내용을 대체합니다. | |
복사 | 선택한 데이터를 복제해 클립보드에 저장합니다. | |
붙여넣기 | 클립보드의 내용을 현재 삽입 지점에 삽입합니다. 클립보드 내용은 변경되지 않으므로 여러 번 붙여넣을 수 있습니다. | |
붙여넣고 스타일 일치 | 클립보드의 내용을 현재 삽입 지점에 삽입하고, 삽입된 텍스트의 스타일을 주변 텍스트에 맞춥니다. | |
삭제 | 선택한 데이터를 삭제하지만 클립보드에 저장하지 않습니다. | ‘지우기’ 메뉴 항목 대신 ‘삭제’ 메뉴 항목을 제공하세요. ‘삭제’를 선택하는 것은 삭제 키를 누르는 것과 동일하므로 명명이 일관되어야 합니다. |
전체 선택 | 현재 문서나 텍스트 컨테이너에서 모든 선택 가능한 내용을 강조 표시합니다. | |
찾기 | 현재 문서나 텍스트 컨테이너에서 검색 작업을 수행하는 메뉴 항목을 포함한 하위 메뉴를 표시합니다. 표준 하위 메뉴에는 ‘찾기’, ‘찾기 및 대치하기’, ‘다음 찾기’, ‘이전 찾기’, ‘선택 부분으로 찾기’, ‘선택 부분으로 이동’이 포함됩니다. | |
맞춤법 및 문법 | 현재 문서나 텍스트 컨테이너에서 맞춤법과 문법을 확인하고 수정하는 메뉴 항목을 포함한 하위 메뉴를 표시합니다. 표준 하위 메뉴에는 ‘맞춤법 및 문법 보기’, ‘지금 문서 확인’, ‘입력하는 동안 맞춤법 검사’, ‘맞춤법 및 문법 검사’, ‘맞춤법 자동 수정’이 포함됩니다. | |
대체 | 문서나 텍스트 컨테이너에서 입력 중에 자동 대체 항목을 토글하는 항목을 포함한 하위 메뉴를 표시합니다. 표준 하위 메뉴에는 ‘대체 항목 보기’, ‘스마트 복사하기/붙여넣기’, ‘스마트 인용 부호’, ‘스마트 대시’, ‘스마트 링크’, ‘텍스트 대치’가 포함됩니다. | |
변형 | 선택한 텍스트를 변형하는 항목을 포함한 하위 메뉴를 표시합니다. 표준 하위 메뉴에는 ‘대문자로 만들기’, ‘소문자로 만들기’, ‘대문자로 문장 시작’이 포함됩니다. | |
말하기 | 선택한 텍스트를 시스템이 음성으로 읽도록 제어하는 ‘말하기 시작’ 및 ‘말하기 중단’ 항목을 포함한 하위 메뉴를 표시합니다. | |
받아쓰기 시작 | 받아쓰기 창을 열고 발화된 단어를 텍스트로 변환하여 현재 삽입 지점에 추가합니다. 시스템은 편집 메뉴 하단에 자동으로 받아쓰기 시작 메뉴 항목을 추가합니다. | |
이모티콘 및 기호 | 이모티콘, 기호 및 기타 문자를 현재 삽입 지점에 삽입하는 문자 뷰어를 표시합니다. 시스템은 편집 메뉴 하단에 자동으로 이모티콘 및 기호 메뉴 항목을 추가합니다. |
The Format menu lets people adjust text formatting attributes in the current document or text container. You can exclude this menu if your app doesn’t support formatted text editing.
포맷 메뉴는 현재 문서나 텍스트 컨테이너의 텍스트 서식 속성을 변경할 수 있게 해줍니다. 만약 해당 앱이 서식이 지정된 텍스트 편집을 지원하지 않는다면, 이 메뉴를 제외할 수 있습니다.
The Format menu typically contains the following top-level menu items, listed in the following order.
포맷 메뉴는 일반적으로 다음과 같은 최상위 메뉴 항목이 포함되어 있습니다.
역자 첨언
Menu item | Action |
Font | Displays a submenu containing items for adjusting font attributes of the selected text. Standard submenus include: Show Fonts, Bold, Italic, Underline, Bigger, Smaller, Show Colors, Copy Style, Paste Style |
Text | Displays a submenu containing items for adjusting text attributes of the selected text. Standard submenus include: Align Left, Align Center, Justify, Align Right, Writing Direction, Show Ruler, Copy Ruler, Paste Ruler |
메뉴 항목 | 동작 |
서체 | 선택된 텍스트의 서체 속성을 조절하는 하위 메뉴를 표시합니다. 표준 하위 메뉴에는 서체 보기, 볼드체, 이탤릭체, 밑줄체, 크게, 작게, 색상 보기, 스타일 복사하기, 스타일 붙여넣기 가 포함됩니다. |
텍스트 | 선택된 텍스트의 텍스트 속성을 조절하는 서브메뉴를 표시합니다. 표준 서브메뉴에는 왼쪽 정렬, 가운데 정렬, 좌우 정렬, 오른쪽 정렬, 쓰기 방향, 눈금 보기, 눈금 복사하기, 눈금 붙여넣기 가 포함됩니다. |
The View menu lets people customize the appearance of all an app’s windows, regardless of type.
보기 메뉴는 모든 창의 모양을 사용자가 지정할 수 있게 해줍니다.
Important
The View menu doesn’t include items for navigating between or managing specific windows; the Window menu provides these commands.
이 메뉴에는 특정 창 간 이동이나 관리와 관련된 항목은 포함되어 있지 않습니다. 이러한 명령은 창 메뉴에서 제공됩니다.
Provide a View menu even if your app supports only a subset of the standard view functions. For example, if your app doesn’t include a tab bar, toolbar, or sidebar, but does support full-screen mode, provide a View menu that includes only the Enter/Exit Full Screen menu item.
표준 보기 기능의 일부만 지원하는 경우에도 보기 메뉴를 제공하세요. 예를 들어, 해당 앱에 탭바, 도구 막대, 또는 사이드바를 사용하지 않지만 전체 화면 모드를 지원한다면, 보기 메뉴에는 전체 화면 시작/종료 항목만 포함하도록 합니다.
Ensure that each show/hide item title reflects the current state of the corresponding view. For example, when the toolbar is hidden, provide a Show Toolbar menu item; when the toolbar is visible, provide a Hide Toolbar menu item.
각 보기/숨기기 항목의 제목이 해당 뷰의 현재 상태를 반영하도록 하세요. 예를 들어, 도구 막대가 숨겨진 경우 도구 막대 보기 항목을 제공하고, 표시된 경우 도구 막대 가리기 항목을 제공하세요.
The View menu typically contains the following top-level menu items, listed in the following order.
일반적으로 보기 메뉴에는 다음과 같은 상위 메뉴 항목이 포함되어 있습니다.
역자 첨언
Menu item | Action |
Show/Hide Tab Bar | |
Show All Tabs/Exit Tab Overview | Enters and exits a view (similar to Mission Control) that provides an overview of all open tabs in a tab-based window |
Show/Hide Toolbar | |
Customize Toolbar | In a window that includes a toolbar, opens a view that lets people customize toolbar items |
Show/Hide Sidebar | |
Enter/Exit Full Screen | In an app that supports a full-screen experience, opens the window at full-screen size in a new space |
Your app’s custom menus appear in the menu bar between the View menu and the Window menu. For example, Safari’s menu bar includes app-specific History and Bookmarks menus.
앱의 커스텀 메뉴는 '보기' 메뉴와 '창' 메뉴 사이의 메뉴 막대에 나타납니다. 예를 들어, Safari의 메뉴 막대에는 방문 기록 및 책갈피 메뉴가 포함되어 있습니다.
Provide app-specific menus for custom commands. People look in the menu bar when searching for app-specific commands, especially when using an app for the first time. Even when commands are available elsewhere in your app, it’s important to list them in the menu bar. Putting commands in the menu bar makes them easier for people to find, lets you assign keyboard shortcuts to them, and makes them more accessible to people using Full Keyboard Access. Excluding commands from the menu bar — even infrequently used or advanced commands — risks making them difficult for everyone to find.
커스텀 명령어에 대한 앱 별 메뉴를 제공하세요. 사용자들은 앱을 처음 사용할 때 특히 앱에 특화된 명령어를 찾을 때 메뉴 막대를 찾습니다. 명령어가 앱 내 다른 위치에서 사용 가능하더라도 메뉴 막대에 나열하는 것이 중요합니다. 명령어를 메뉴 막대에 넣으면 사용자가 쉽게 찾을 수 있으며, 단축키를 할당할 수 있고, 키보드로 앱을 사용하는 사용자들에게 더 접근성이 높아집니다. 사용빈도가 낮거나 고급 사용자용 명령어라도 메뉴 막대에서 제외하는 것은 모두가 찾기 어렵게 만들 수도 있습니다.
As much as possible, reflect your app’s hierarchy in app-specific menus. For example, Mail lists the Mailbox, Message, and Format menus in an order that mirrors the relationships of these items: mailboxes contain messages, and messages contain formatting.
가능한 한 앱의 계층 구조를 앱 별 메뉴에 반영하세요. 예를 들어, 메일은 메일상자, 메시지, 포맷 메뉴를 항목의 관계를 반영하는 순서로 나열합니다: 메일상자에는 메시지가 포함되고, 메시지에는 포맷이 포함됩니다.
Aim to list app-specific menus in order from most to least general or commonly used. People tend to expect menus in the leading end of a list to be more specialized than menus in the trailing end.
가능한 한 앱 별 메뉴를 가장 일반적이거나 자주 사용되는 순서로 나열하세요. 사람들은 목록의 앞 부분에 있는 메뉴가 뒷부분의 메뉴보다 더 특화되었을 것이라 기대합니다.
The Window menu lets people navigate, organize, and manage an app’s windows.
윈도우 메뉴를 통해 사용자는 앱의 창을 탐색, 정리 및 관리할 수 있습니다.
Important
The Window menu doesn’t help people customize the appearance of windows or close them. To customize a window, people use commands in the View menu; to close a window, people choose Close in the File menu.
윈도우 메뉴는 창의 모양을 커스텀하거나 닫는 것이 아닙니다. 창을 커스텀하려면 사용자는 보기 메뉴의 명령을 사용하고, 창을 닫으려면 파일 메뉴에서 닫기를 선택합니다.
Provide a Window menu even if your app has only one window. Include the Minimize and Zoom menu items so people using Full Keyboard Access can use the keyboard to invoke these functions.
앱이 하나의 창만 있는 경우에도 윈도우 메뉴를 제공하세요. 키보드로만 앱을 사용하는 사용자들이 이러한 기능을 키보드로도 사용할 수 있도록 최소화 및 확대 메뉴 항목을 포함하세요.
Consider including menu items for showing and hiding panels. A panel provides information, configuration options, or tools for interacting with content in a primary window, and typically appears only when people need it. There’s no need to provide access to the font panel or text color panel because the Format menu lists these panels.
패널을 표시하고 숨기는 메뉴 항목을 포함하는 것을 고려하세요. 패널은 주 창에서 내용과 상호 작용하기 위한 정보, 구성 옵션 또는 도구를 제공하며 일반적으로 필요한 경우에만 나타납니다. 서체 패널이나 텍스트 색상 패널에 대한 액세스를 제공할 필요가 없습니다. 왜냐하면 포맷 메뉴에서 이러한 패널을 나열하기 때문입니다.
The Window menu typically contains the following top-level menu items, listed in the following order.
윈도우 메뉴에는 일반적으로 다음과 같은 최상위 메뉴 항목이 포함되며, 다음과 같은 순서로 나열됩니다.
역자 첨언
Menu item | Action | Guidance |
Minimize | Minimizes the active window to the Dock. Pressing the Option key changes this item to Minimize All. | |
Zoom | Toggles between a predefined size appropriate to the window’s content and the window size people set. Pressing the Option key changes this item to Zoom All. | |
Show Previous Tab | Shows the tab before the current tab in a tab-based window | |
Show Next Tab | Shows the tab after the current tab in a tab-based window | |
Move Tab to New Window | Opens the current tab in a new window | |
Merge All Windows | Combines all open windows into a single tabbed window | |
Enter/Exit Full Screen | In an app that supports a full-screen experience, opens the window at full-screen size in a new space | Include this item in the Window menu only if your app doesn’t have a View menu. In this scenario, continue to provide separate Minimize and Zoom menu items. |
Bring All to Front | Brings all an app’s open windows to the front, maintaining their onscreen location, size, and layering order. (Clicking the app icon in the Dock has the same effect.) Pressing the Option key changes this item to Arrange in Front, which brings an app’s windows to the front in a neatly tiled arrangement. | |
Name of an open app-specific window | Brings the selected window to the front | List the currently open windows in alphabetical order for easy scanning. Avoid listing panels or other modal views. |
메뉴 항목 | 동작 | 가이드 |
윈도우 축소 | 현재 창을 Dock으로 축소시킵니다. Option 키를 누르면 이 항목이 모두 최소화로 변경됩니다. | |
확대 | 창의 내용에 적합한 미리 정의된 크기와 사용자가 설정한 창 크기 간을 토글합니다. Option 키를 누르면 이 항목이 모두 확대로 변경됩니다. | |
이전 탭 보기 | 탭 기반 창에서 현재 탭 이전의 탭을 표시합니다. | |
다음 탭 보기 | 탭 기반 창에서 현재 탭 다음의 탭을 표시합니다. | |
새로운 윈도우로 탭 이동 | 현재 탭을 새 창에서 엽니다. | |
모든 윈도우 통합 | 모든 열린 창을 하나의 탭으로 통합합니다. | |
전체 화면 시작/종료 | 전체 화면으로 전환/종료을 지원하는 앱에서 창을 새로운 공간에서 전체 화면 크기로 엽니다. | 이 항목은 앱에 보기 메뉴가 없는 경우에만 윈도우 메뉴에 포함합니다. 이 경우에도 별도로 최소화 및 확대 메뉴 항목을 제공하세요. |
모두 앞으로 가져오기 | 앱의 모든 열린 창을 현재 창 위치, 크기 및 층 정렬 순서를 유지한 채로 최상위로 가져옵니다. (Dock에서 앱 아이콘을 클릭하는 것과 동일한 효과가 있습니다.) Option 키를 누르면 이 항목이 ‘차례대로 정렬’ 로 변경되어 앱 창을 타일 형식으로 깔끔하게 정렬됩니다. | |
현재 열린 앱 특정 창의 이름 | 선택한 창을 전면에 표시합니다. | 현재 열린 창을 알파벳 순으로 나열하여 쉽게 스캔할 수 있도록 합니다. 패널이나 기타 모달 뷰를 나열하지 않도록 주의하세요. |
The Help menu — located at the trailing end of the menu bar — provides access to an app’s help documentation. When you use the Help Book format for this documentation, macOS automatically includes a search field at the top of the Help menu.
도움말 메뉴는 메뉴 막대의 끝 부분에 위치하며 앱의 도움말 문서에 액세스할 수 있도록 합니다. 이 도움말 문서를 설명서 형식으로 제공할 때 macOS는 자동으로 도움말 메뉴 상단에 검색 필드를 포함시켜 줍니다.
Menu item | Action | Guidance |
Send YourAppName Feedback to Apple | Opens the Feedback Assistant, in which people can provide feedback. | |
YourAppName Help | When the content uses the Help Book format, opens the content in the built-in Help Viewer. | |
Additional Item | Use a separator between your primary help documentation and additional items, which might include registration information or release notes. Keep the total the number of items you list in the Help menu small to avoid overwhelming people with too many choices when they need help. Alternatively, consider linking to additional items from within your help documentation. |
메뉴 항목 | 동작 | 가이드 |
Apple에 ’앱이름’ 피드백 보내기 | 피드백 어시스턴트를 열어 사용자가 피드백을 제공할 수 있습니다. | |
‘앱이름’ 도움말 | 도움말 콘텐츠가 설명서 형식을 사용하는 경우 내장된 도움말 뷰어에서 콘텐츠를 엽니다. | |
추가 항목 | 주요 도움말 문서와 추가 항목(등록 정보 또는 릴리스 노트 등) 사이에 구분선을 사용하세요. 사용자가 많은 선택 사항에 압도되지 않도록 메뉴 항목의 총 갯수를 적게 유지하는 것이 좋습니다. 대신 도움말 문서 내에서 추가 항목으로 연결하는 것을 고려해 보세요. |
In rare cases, it can make sense to present a dynamic menu item, which is a menu item that changes its behavior when people choose it while pressing a modifier key (Control, Option, Shift, or Command). For example, the Minimize item in the Window menu changes to Minimize All when people press the Option key.
드물게, 동적 메뉴 항목을 제공할 수 있습니다. 동적 메뉴 항목은 사용자가 수정자 키 (Control, Option, Shift 또는 Command)를 누르면 선택 시 동작이 변경되는 메뉴 항목입니다. 예를 들어, 윈도우 메뉴의 최소화 항목은 Option 키를 누를 때 모두 최소화로 변경됩니다.
Avoid making a dynamic menu item the only way to accomplish a task. Dynamic menu items are hidden by default, so they’re best suited to offer shortcuts to advanced actions that people can accomplish in other ways. For example, if someone hasn’t discovered the Minimize All dynamic menu item in the Window menu, they can still minimize each open window.
동적 메뉴 항목이 작업을 수행하는 유일한 방법이 되는 것을 지양하세요. 동적 메뉴 항목은 기본적으로 숨겨져 있으므로 다른 방법으로도 수행할 수 있는 고급 작업에 대한 단축키를 제공하는 데 가장 적합합니다. 예를 들어, 누군가가 윈도우 메뉴의 모두 최소화 동적 메뉴 항목을 발견하지 못했더라도 개별 창은 최소화할 수 있어야 합니다.
Use dynamic menu items primarily in menu bar menus. Adding a dynamic menu item to contextual or Dock menus can make the item even harder for people to discover.
동적 메뉴 항목은 주로 메뉴 막대의 메뉴에서 사용하세요. 동적 메뉴 항목을 컨텍스트 메뉴나 독(Dock) 메뉴에 추가하면 이 항목을 발견하기가 더 어려워질 수 있습니다.
Require only a single modifier key to reveal a dynamic menu item. It can be physically awkward to press more than one key while simultaneously opening a menu and choosing a menu item, in addition to reducing the discoverability of the dynamic behavior. For developer guidance, see isAlternate.
동적 메뉴 항목을 표시하려면 하나의 수정자 키만 필요합니다. 메뉴를 열고 메뉴 항목을 선택하는 동안 하나 이상의 키를 동시에 누르는 것은 물리적으로 어색할 수 있으며, 동적 동작의 발견 가능성을 줄일 수 있습니다. 개발자 가이드는 isAlternate를 참조하세요.
Tip
macOS automatically sets the width of a menu to hold the widest item, including dynamic menu items.
macOS는 동적 메뉴 항목을 포함해 메뉴의 폭을 자동으로 가장 넓은 항목을 포함할 수 있도록 설정합니다.
A menu bar extra exposes app-specific functionality using an icon that appears in the menu bar when your app is running, even when it’s not the frontmost app. Menu bar extras are on the opposite side of the menu bar from your app’s menus. For developer guidance, see MenuBarExtra.
메뉴 막대 엑스트라는 앱이 실행 중일 때 메뉴 막대에 나타나는 아이콘을 사용하여 앱 별 기능을 표시합니다. 이는 해당 앱이 최상위 앱이 아닐 때에도 나타납니다. 메뉴 막대 엑스트라는 앱의 메뉴가 있는 곳과는 반대편에 위치합니다. 개발자 가이드는 MenuBarExtra를 참조하세요.
When necessary, the system hides menu bar extras to make room for app menus. Similarly, if there are too many menu bar extras, the system may hide some to avoid crowding app menus.
필요한 경우 시스템은 앱 메뉴에 공간을 확보하기 위해 메뉴 바 엑스트라를 숨길 수 있습니다. 마찬가지로, 메뉴 바 엑스트라가 너무 많으면 시스템은 앱 메뉴가 혼잡하지 않도록 일부를 숨길 수 있습니다.

Consider using a symbol to represent your menu bar extra. You can create an icon or you can choose one of the SF Symbols, using it as-is or customizing it to suit your needs. Both interface icons and symbols use black and clear colors to define their shapes; the system can apply other colors to the black areas in each image so it looks good on both dark and light menu bars, and when your menu bar extra is selected. The menu bar’s height is 24 pt.
메뉴 막대 엑스트라를 나타내기 위해 기호를 사용하는 것을 고려해 보세요. 아이콘을 생성하거나 SF Symbols 중 하나를 선택하여 필요에 맞게 사용할 수 있습니다. 인터페이스 아이콘과 기호는 모두 모양을 정의하기 위해 검은색과 투명한 색상을 사용합니다. 시스템은 각 이미지의 검은 영역에 다른 색상을 적용하여 어두운 및 밝은 메뉴 바에서 모두 잘 보이도록 조정합니다. 메뉴 바의 높이는 24 pt입니다.
Display a menu — not a popover — when people click your menu bar extra. Unless the app functionality you want to expose is too complex for a menu, avoid presenting it in a popover.
메뉴 막대 엑스트라를 클릭할 때 팝오버가 아닌 메뉴를 표시하세요. 메뉴로 노출하기에 앱의 기능이 너무 복잡하지 않은 한 팝오버를 피하세요.
Let people — not your app — decide whether to put your menu bar extra in the menu bar. Typically, people add a menu bar extra to the menu bar by changing a setting in an app’s settings window. To ensure discoverability, however, consider giving people the option of doing so during setup.
사용자들이 메뉴 막대 엑스트라를 메뉴 막대에 넣을지 여부를 결정할 수 있도록 하세요. 일반적으로 사용자들은 앱 설정 창에서 설정을 변경해 메뉴 막대 엑스트라를 메뉴 막대에 추가합니다. 그러나 발견 가능성을 높이기 위해 초기 설정 중에 메뉴 막대 엑스트라를 추가할 수 있는 옵션을 제공하는 것이 좋습니다.
Avoid relying on the presence of menu bar extras. The system hides and shows menu bar extras regularly, and you can’t be sure which other menu bar extras people have chosen to display or predict the location of your menu bar extra.
메뉴 막대 엑스트라의 존재에 의존하지 마세요. 시스템은 정기적으로 메뉴 막대 엑스트라를 숨기거나 보여주는데, 사용자가 사용하고자 할 때 해당 메뉴 막대 엑스트라가 표시될 지 알 수 없습니다.
Consider exposing app-specific functionality in other ways, too. For example, you can provide a Dock menu that appears when people Control-click your app’s Dock icon. People can hide or choose not to use your menu bar extra, but a Dock menu is aways available when your app is running.
앱 별 기능을 다른 방식으로도 노출하는 것을 고려하세요. 예를 들어, 앱의 Dock 아이콘을 Control 키와 함께 클릭하면 나타나는 Dock menu를 제공할 수 있습니다. 사용자는 메뉴 막대 엑스트라를 숨기거나 사용하지 않을 수 있지만 Dock menu는 앱이 실행 중일 때 항상 사용할 수 있습니다.
Not supported in iOS, iPadOS, tvOS, visionOS, or watchOS.
CommandMenu — SwiftUI
NSStatusBar — AppKit
Change log
작성 날짜 | 작성자 | 수정사항 |
2023/12/15 | 디온 | 초기 번역 |